When you are in the Select Calendar Options menu, you will see the option to “Import Calendars.” This allows you to automatically transfer over your saved dates, birthdays, and additional appointments from an existing calendar into your Motif calendar. Tap “Done” and you will be returned to the Calendar Options menu
Your imported calendar dates will now automatically display on your calendar!
You can do this when creating your calendar project for the first time, or add it to a previously existing Motif Calendar Project.
In an existing Motif Calendar Project tap the “Options” icon in the lower right. Select “Change Calendar Options,” and at the bottom of the new window you will see the “Import Calendars” feature.
In the “Import Calendars” menu, select from the detected calendars which you would like to include in your calendar and tap “Done” in the upper lefthand corner.
Upon returning to the “Calendar Options” window, tap “Done” to go into the project view.
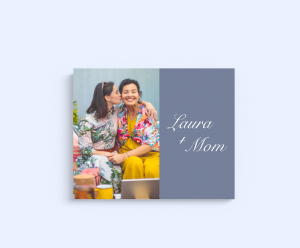
Select the images for your calendar(1:36)
Once you’ve set up your calendar’s options, it’s time to select the images you’re going to use. Tap “Next” in the upper right hand corner
In the “Select Image Source” screen, choose from either your ‘Memories’ or ‘Albums’.
What are memories and albums?
Memories are collections of images automatically curated upon opening Motif, connected primarily by geographic location and time.
Albums contain groupings of images you’ve previously created, as well as your entire camera roll, favorited images, and other media types.
If you choose your photos from Memories, a handy slider bar at the bottom of the page lets you select the number of images in the Memories. Larger Memories contain more images for your calendar, while smaller Memories contain fewer images.
Select a Memory of your choice. Motif instantly begins analyzing all the images in what we call “image curation.” Image curation scans for the best images based on various aesthetic criteria and removes any duplicates.
On the next screen, you can tap on any of the images to include or exclude them from the calendar as you wish. It’s really up to you!
If you’d prefer to choose your photos from Albums, tap “Albums,” and then tap the album you want. Select a minimum of 20 images, and tap “Next.”
Once you’ve selected all the images you’d like, you’re ready to pick a calendar theme!
Select your theme(0:48)
Let’s start getting creative! First up: Picking a theme.
Scroll through and pick the Theme that best represents your story and style. You’ll notice, your curated photos are already appearing in the sample thumbnails.
Themes are available to compliment a wide variety of projects. Each contains unique patterns, background colors, fonts, and image/text pairings.
Not sure if you’re ready to fully commit? Don’t worry, you can change your theme at any time. With Motif, you’re always in creative control.
Select your desired theme by tapping on it, this will load your calendar project so you can start making detailed edits.
Project editing panel overview(0:46)
After you select the Theme of your calendar, you will arrive at the main screen of the Project Editor. Let’s briefly go over the layout.
In the upper right corner of the blue bar, you can see the Checkout button. When you’re happy with your calendar, tap here to turn your calendar into reality!
At the bottom you’ll find 4 icons to help with creating your calendar. Images, Style, Layouts, and Options.
Add a photo or text into a day box in your calendar(1:11)
To add an image or text to a date, first, simply tap on the date.
A window will pop up. Click either “Add Image” or “Add Text.”
After selecting “Add Image” you’ll be prompted to choose an image from your photo collection. You may also edit the photo’s cropping, zoom, and effects at this stage.
Once you’re satisfied, tap “Done” at the bottom right. Voila! Your image should appear on your calendar.
Tap on “Add Text” and you’ll be brought to the “Edit Text” screen. Here you can type anything you wish, and then style your text using the “Style” icon.
Tap “Style”, now you can adjust the text font, size, color and positioning.
Tap “Done” when you’re ready. Now you can make any day in your calendar a special day!
Remove or select national holidays for different countries(0:41)
Perhaps you don’t want any national holidays in your Motif calendar? No problem!
Simply tap the “Options” icon from the bar at the bottom of your screen. It’s the one with the gear icon.
Select “Change Calendar Options.” At the bottom of the new menu tap on the “National Holidays” selection. Choose “None” or change to any of the programmed national holidays.
When you’re back at the Calendar Options menu tap “Done” in the upper right hand side of your screen. The holidays will disappear or change automatically from your calendar!
Import your contacts’ birthdays or import personal calendars or add any other events(1:13)
You can quickly and easily insert your contacts’ birthdays into your calendar by tapping the “Options” icon and then selecting “Import Birthday from Contacts.”
In the window which pops up, simply select the contacts from the list which you would like to include and tap “Done.” Your contact’s birthdays will be added automatically. It’s that simple!
To import your personal calendars in an existing Motif Calendar Project tap the “Options” icon in the lower right. Select “Change Calendar Options,” and at the bottom of the new window you will see the “Import Calendars” feature.
In the “Import Calendars” menu, select from the detected calendars which you would like to include in your calendar and tap “Done” in the upper lefthand corner.
Returning to the “Calendar Options” window, tap “Done” to go into the project view. Just like that your calendar’s saved dates will appear in Motif!
You can always quickly add any additional events by tapping on a specific date and adding your choice of an image or text.
Change a month’s image and text layout(1:19)
Select the month you want to edit by tapping on its name at the bottom of the calendar preview image. It will highlight in blue.
Tap on the “Layout” icon in the bottom bar.
In the new Layout window, at the bottom of the screen you can choose how many images to feature on this month. Motif allows up to 9 images per month.
Scroll through the layout options and choose the arrangement of image and text which tells your story the best!
Once you’ve selected the layout, you’ll return to the calendar view. Tap on the image frames to choose a new image or to edit the already placed image.
Select the image you want from the tray at the bottom. You can further edit the image by tapping on the “Effects” icon beneath the photo tray.
In the ‘Edit image’ screen you may apply a filter and also re-size and apply filters to your image. Tap done to apply your changes.
If you picked a layout that includes text, tap it to edit. You’ll be brought to the “Edit Text” screen. Here you can type whatever you wish, and then modify using the “Style” icon at the bottom of the screen.
When you’re satisfied, tap “Done.” That’s it!
Change background colours and patterns(0:59)
With your image and text layout selected, let’s explore the background options.
Choose the month you want to edit by tapping on its name at the bottom of the calendar preview image. It will highlight in blue.
Tap on the “Style” icon in the bottom bar.
Now, in the “Apply Styles” window you can choose a solid color by selecting a swatch located at the bottom of the screen.
After selecting the color that fits best, you can explore some patterns by tapping the “Patterns” icon next to “Colors.”
You can switch between these tabs to find the perfect combination of pattern and color!
When you’re satisfied you can hit “Done” to apply your changes to the selected month. Or, you can tap “Apply To” to apply the selected pattern and color combo to your entire calendar!